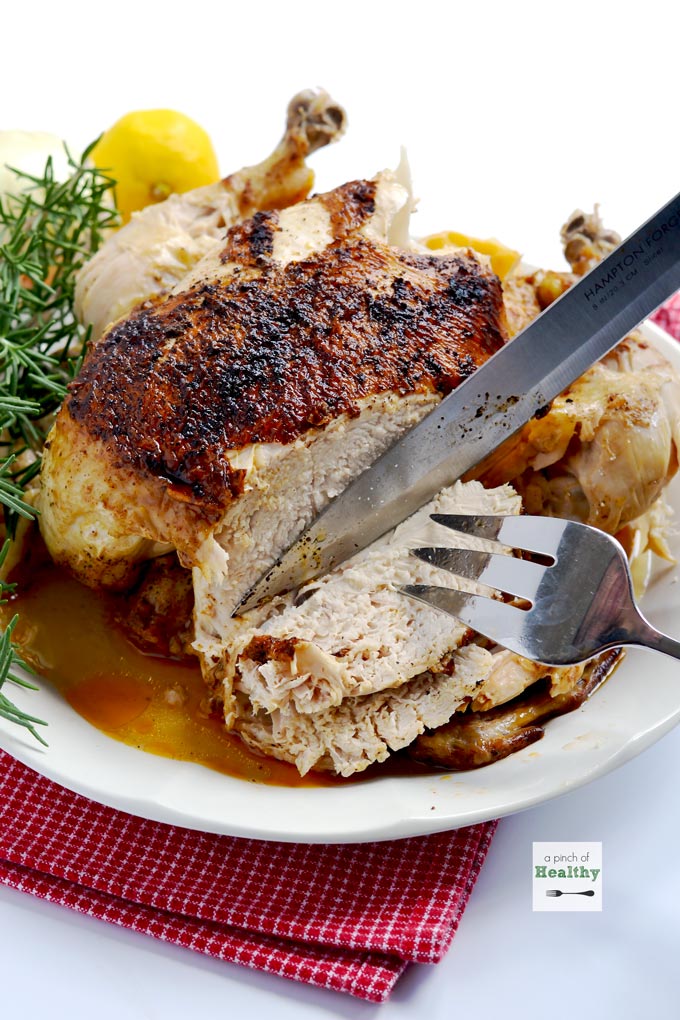
All you need is about 45 minutes to have this amazing, tender, juicy Instant Pot whole rotisserie chicken. Your whole family will LOVE it!

Note: This post contains Amazon affiliate links. See my full affiliate disclosure policy here.
You can totally make this “rotisserie” chicken fake-out in your Instant Pot. It is practically fool-proof. And it is just so much better than the store-bought kind.
I even crisp up the skin first to give it that rotisserie feel. I use the instant pot’s sauté setting to do that, and then I flip it over and add a little chicken stock before cooking it on the manual pressure setting.
Plus, I love that you can control the quality of ingredients that you use to make this.
It is perfectly tender and juicy…and ready in about 45 minutes.
How to make Instant Pot Rotisserie Chicken
First, gather your ingredients.
Ingredients
For tastiest results, always use the best quality ingredients you have access to.
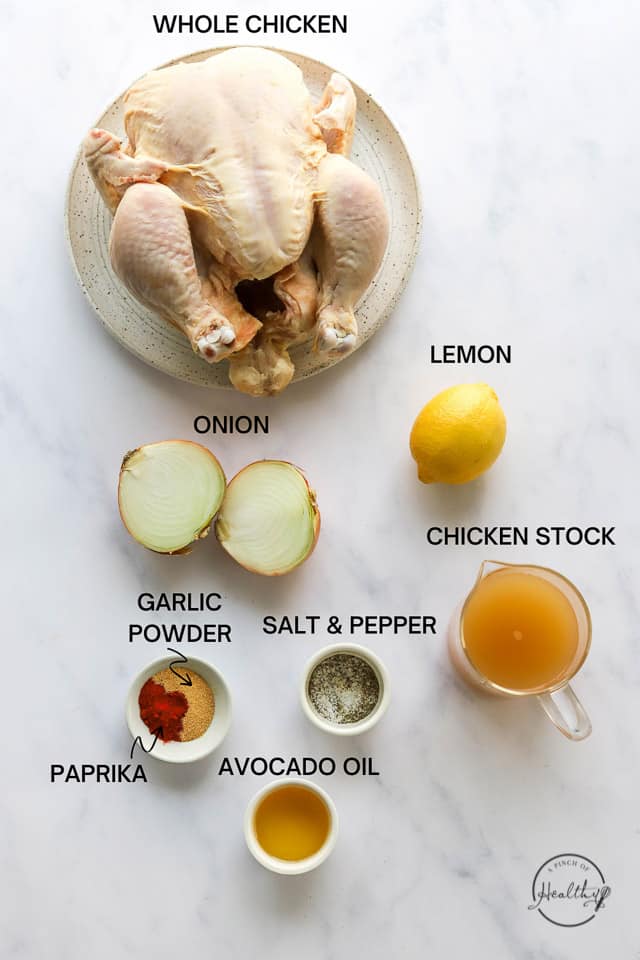
To make this Instant Pot “rotisserie” chicken recipe, you will need the following:
- whole chicken
- salt & pepper
- garlic powder/ granulated garlic
- paprika
- avocado oil (or you can use coconut or canola – something with a high smoke point)
- onion (optional)
- lemon (optional)
- 1 cup chicken stock, broth or water
Preparing the whole chicken
First, remove all parts from the chicken cavity; rinse and pat dry with a paper towel. Optional: place the onion and lemon in the cavity of the chicken.
Combine all of the spices, including salt and pepper, in a small ramekin dish; stir together.
Add the oil to the spices, and stir until incorporated.
Cooking Instant Pot rotisserie chicken
Turn on your Instant Pot to preheat on the sauté setting. Rub half of the oil and spice mixture on the breast side of the chicken.
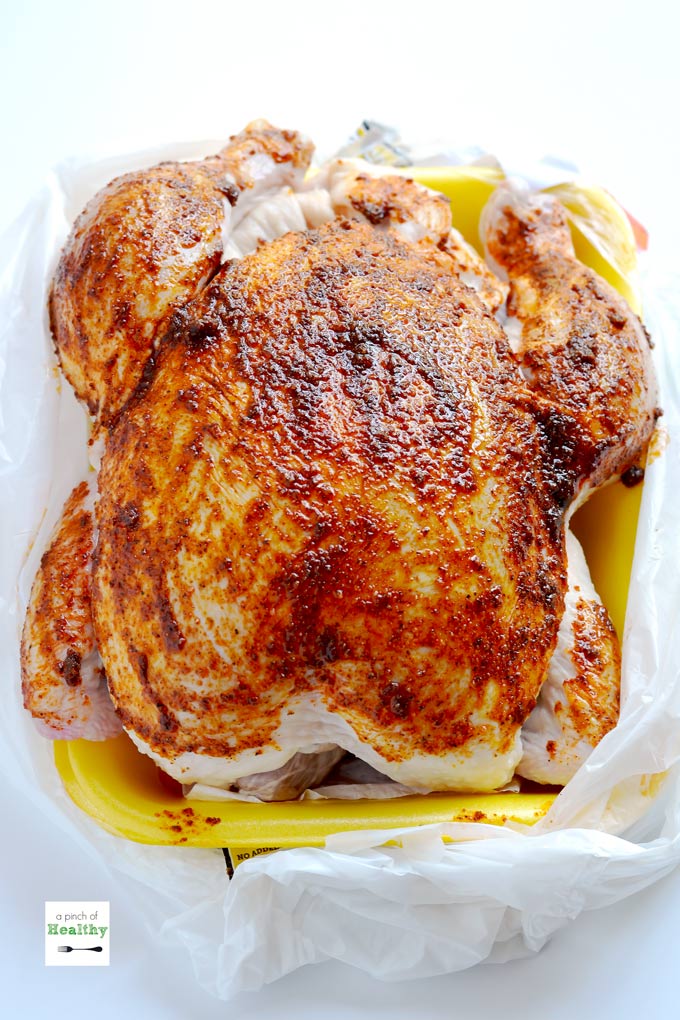
Place the chicken, breast side down, in the preheated Instant Pot. Carefully rub the other half of the oil and spices mixture on the other side of the chicken.
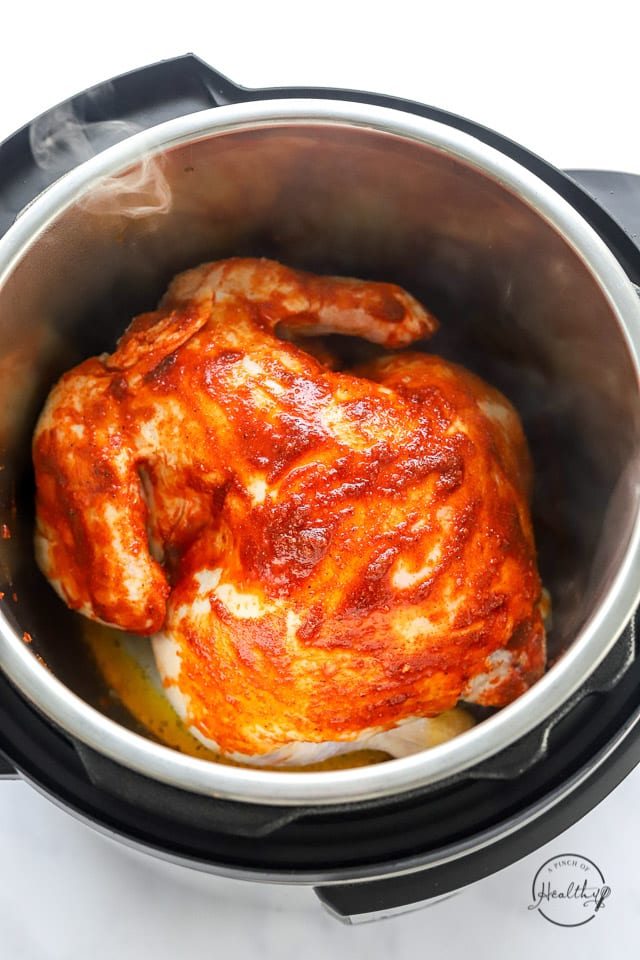
Allow the breast side to crisp up the chicken skin for a few minutes, about 3 to 4 minutes total. Carefully flip the chicken over to the other side, and let it crisp up the skin on the other side for about a minute.
Flipping it over was a little awkward, but it helps to use a sturdy burger flipper and some tongs.
Optional step: If you do not want your chicken sitting in the liquids, you can remove the chicken after it browns on the second side and place the trivet in the pot. Then place the chicken, breast side up, on the trivet.
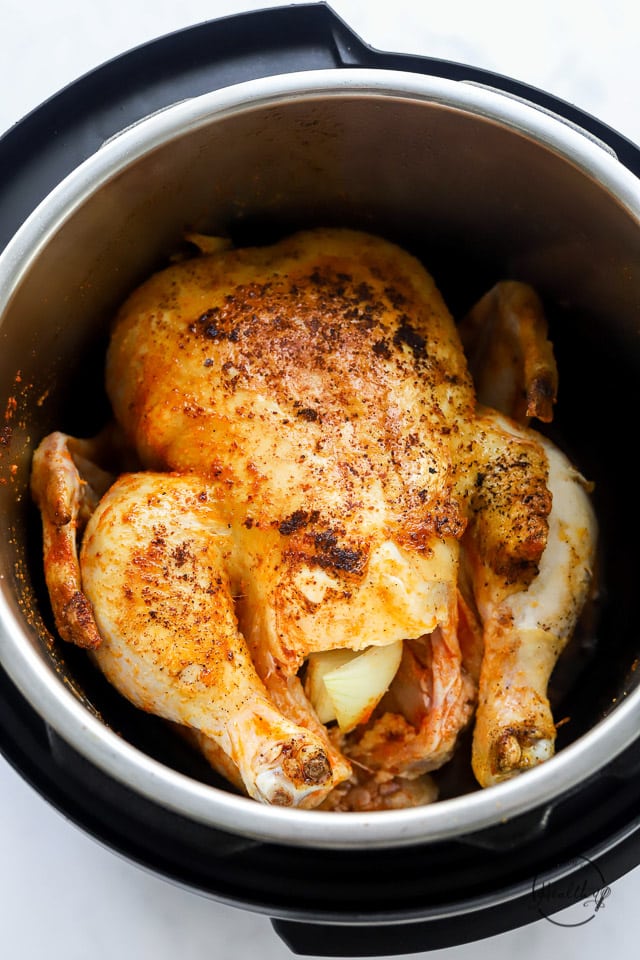
Next, add in the chicken stock. Place the lid on and lock it, per Instant Pot instructions. Set to high pressure for 25 minutes.
Allow the Instant Pot to depressurize naturally (I.e., do not use the venting lever, but allow the pressure to dissipate slowly. Mine took about 15 minutes.) Remove the lid, and transfer the chicken to a serving plate. Mine was so tender that it was falling apart a little!

Let the chicken rest for about 5 minutes prior to serving. I like to spoon or brush a little of the cooking liquid over the top just prior to serving to make the chicken extra juicy.
If you do not have an instant pot, this recipe should still work in a large stovetop pressure cooker.
Update: I have added an additional (optional) step to this recipe. If you do not want your chicken sitting in all the liquids, you can remove the chicken after browning the second side. Then add the liquids and trivet, and return the chicken (breast side up) to the pot.
Our family loved the original recipe, and it certainly was easier just to leave the bird in the pot and pour the chicken stock right in. But this extra step may be worth it to you if you don’t want the underside of your chicken sitting in liquid.
Helpful hint: Don’t throw away the liquid or the bones. Use it to make chicken bone broth.
FAQ’s About Instant Pot Whole Rotisserie Chicken
Can I use a frozen whole chicken?
Several people in my audience have had success using frozen chicken. When I have tested this myself, I have had mixed results. So for best results, I recommend using fully thawed chicken.
Can I add vegetables or rice to the pot to cook with the chicken?
I would not recommend rice, since the cook times don’t match up. Your rice would most likely get very mushy. One vegetable that I have had luck with are small/medium red potatoes. The trick is to fit them around the chicken. They will get really soft, but they are still good. Larger/ thick carrots may work okay too. Everything else I have tried gets too mushy.
Can I make this without stuffing the cavity with lemon and onion?
Yes, I do this all the time. It is still really tasty.😋👌🏻
Do I need more liquid if I am making this in an 8 quart model?
Yes, I would recommend the minimum liquid requirement for this model, which is 1.5 cups of liquid.
Why don’t you use the “poultry” button for this recipe?
I use manual high pressure for most of my Instant Pot recipes. Honestly, I have tried the other buttons and have not noticed much of a difference. 🤷🏼♀️
More Instant Pot Recipes You May Enjoy
- Instant Pot “baked” sweet potatoes
- Instant Pot classic beef chili
- Instant Pot red beans and rice
- Instant Pot chicken breasts
- Instant Pot chicken thighs
- Instant Pot pasta e fagioli soup
- Instant Pot hard boiled eggs
- Instant Pot spaghetti (one pot)
- Instant Pot chicken recipes
- Instant Pot oatmeal (pot in pot method)
👉🏻👉🏻See ALL of my Instant Pot recipes here.👈🏻👈🏻
Tools Used to Make Instant Pot Whole Rotisserie Chicken
Note: These are Amazon affiliate links.
- Instant pot electric pressure cooker
- Measuring spoons
- Small bowl or ramekin for mixing spices & oil
- Tongs and burger flipper for flipping over the chicken
- Meat thermometer to check internal temperature
Instant Pot Whole Rotisserie Chicken Recipe
Did you try this recipe? Give it a star rating. Pin it and share it if it looks good to you. And be sure and stay connected on social media!
Instagram | Pinterest | Facebook | YouTube | TikTok
Be sure and check out all my favorite kitchen tools in my Amazon store (affiliate).

Instant Pot “Rotisserie” Chicken
Ingredients
- 1 whole chicken mine was 4.3 pounds
- 1 and 1/2 teaspoons salt
- 1/2 teaspoon pepper
- 1 teaspoon granulated garlic
- 1 teaspoon paprika
- 1 and 3/4 Tablespoons avocado oil (or you can use coconut or canola – something with a high smoke point)
- 1 yellow onion quartered (optional)
- 1 lemon halved (optional)
- 1 cup chicken stock or broth
Instructions
- Remove all parts from the chicken cavity; rinse and pat dry with a paper towel.
- Optional: place the onion and lemon in the cavity of the chicken.
- Combine all of the spices, including salt and pepper, in a small ramekin dish; stir together.
- Add the oil to the spices, and stir until incorporated.
- Turn on your Instant Pot to preheat on the sauté setting on “normal.”
-
Rub half of the oil and spice mixture on the breast side of the chicken.
- Place the chicken, breast side down, in the preheated Instant Pot.
- Carefully rub the other half of the oil and spices mixture on the other side of the chicken.
- Allow the breast side to crisp up the chicken skin for a few minutes, about 3 to 4 minutes total.
- Carefully flip the chicken over to the other side, and let it crisp up the skin on the other side for about a minute. Flipping it over was a little awkward, but it helps to use a sturdy burger flipper and some tongs.
- Optional step: If you do not want your chicken sitting in the liquids, you can remove the chicken after it browns on the second side and place the trivet in the pot. Then place the chicken, breast side up, on the trivet.
- Add in the chicken stock.
- Place the lid on and lock it, per Instant Pot instructions.
-
Set to manual high pressure for 25 minutes.
- Allow the Instant Pot to depressurize naturally (I.e., do not use the venting lever, but allow the pressure to dissipate slowly. Mine took about 15 minutes)
- Remove the lid, and transfer the chicken to a serving plate. Mine was so tender that it was falling apart a little!
- Let the chicken rest for about 5 minutes prior to serving.
- I like to spoon or brush a little of the cooking liquid over the top just prior to serving to make the chicken extra juicy.
Recipe Notes
* 40 minutes includes time for the Instant Pot to naturally depressurize.
Cooking time may vary slightly if your chicken is much different in size than this one, which was 4.3 pounds. Use a meat thermometer if you are unsure, just to be safe! Internal temperature for chicken should be 165 degrees Fahrenheit.
Nutritional information is approximate and was calculated using a recipe nutrition label generator.

See ALL of my Instant Pot recipes here.
Note: Instant Pot rotisserie chicken originally appeared on A Pinch of Healthy September 27, 2016. It has been updated with new photos. Here is what it used to look like.


Cathy says
Excellent recipe…I used the leftover liquid to make a yummy gravy. I also added a sprinkle of crushed rosemary on the chicken at the beginning…one of my favorite herbs.
Marjorie@APinchOfHealthy says
Great! I am so happy to hear that you enjoyed it Cathy. Oh, I love rosemary too. I bet that was delicious!
Marjorie@APinchOfHealthy says
Hi Carol! That is a great tip!
Kara says
Thanks for the recipe! The dark meat turned out to be fall-apart deliciousness while the white meat got pretty dry and not as tender. I will play with this a little and see what I can do.
Marjorie@APinchOfHealthy says
Hi Kara! Maybe try a little less cook time next time? Dark meat is way more forgiving of overcooking. White meat, not so much.
Marjorie@APinchOfHealthy says
I am sure you are finished with it now since I am just now seeing this comment. Sorry! But yes, it would need more time. You could try letting it sit in the hot pot on keep warm. Sometimes if the pot is still hot resting will let the temp rise a little. If not, I would put it back in for 1 minute, and let it NPR for 5 minutes.
Irene says
Any suggestions on what can be done with the broth and chicken liquids that remain at the bottom of the pot?
Marjorie@APinchOfHealthy says
Hi Irene! Yes, save it and dump it back in the pot with the carcas + a few other things to make chicken stock/ bone broth: http://www.apinchofhealthy.com/chicken-bone-broth/
nhoetker says
I pour it out and measure 2 liquid cups back into the pot, then stir in 2 dry cups of white/jasmine rice (well-rinsed), and cook on Manual/HP 3 minutes, NPR 10 minutes, then QR. I don’t skim off the fat, so the rice is a bit oily, but so delicious alongside the chicken, which has rested, covered in foil, while the rice cooks. Any liquid left over after measuring for rice gets added to the broth fixings.
Karen says
Marjorie, I used your reciped for a 3.5 bird. Very good!! Do you do anythin with the leftover liquid?
Marjorie@APinchOfHealthy says
I am so glad that you enjoyed it Karen! I dump that liquid into the pot when I go to make chicken stock/ bone broth. I almost always make bone broth with leftover whole chicken. If I can’t get to it right away, I freeze the bones and that liquid you mention. http://www.apinchofhealthy.com/chicken-bone-broth/
audcrane says
Tried this recipe and loved it! I personally always make ‘jus’ after a recipe like this: strain, pour off the fat, and add a slurry of water mixed with corn starch (2T water to 2t corn starch). Passing that with the chicken plus whatever veggies I serve with it is always a hit!
Marjorie@APinchOfHealthy says
That sounds amazing!😋
Aaron says
Hi! I can’t find a whole chicken that weighs less than 7-8lbs! How long should an 8lb chicken cook for??
Karen says
I read on another site that to calculate cooking time, multiple the birds weight by 5.5. Hope that helps.
Marjorie@APinchOfHealthy says
I had heard somewhere else 6 min per pound, plus 2 minutes, and that seemed a little long to me. 5.5 does sound more reasonable. Thanks for sharing that tip!
Chuck Vistart says
6 mins +2 for quick release of pressure, however, the chicken may be a little tougher or drier from what I read from other remarks. I haven’t tried your recipe, but will soon. Sounds delicious.
Sara Janes says
Thanks so much for the delicious recipe! It was easy to make and it turned out perfect.
Anne says
When you say “Set the manual pressure cooker setting to 25 minutes,” do you mean to set it to high pressure? medium? low? Some combination? Thanks for clarifying.
Marjorie@APinchOfHealthy says
Hi Anne! Yes, it is manual high pressure.
Anne says
Thanks for the response, Marjorie! I’m new to pressure cooking, so I want to make sure I’ve got all the details right before embarking on a new recipe. And I’ll be trying this one soon, for sure. Thanks again.
Kimberly Jacks says
Have you ever done this with a frozen chicken?
Marjorie@APinchOfHealthy says
I never have, but I would imagine you would need to add some cook time to what I have suggested here.
Kimberly Jacks says
I’m researching and it appears an additional 15 may do the trick! I just snatched a rather large whole chicken out of the freezer an hour ago hoping for it to be ready by 6:30pm EST. I think I’ll let it thaw until then and add ten minutes. Yay trusty meat thermometer!
Michelle Gibson says
How did it come out?
Kimberly Jacks says
well, funny story… because it was frozen and I neglected to calculate the whole giblets issue… I cooked it on high for 50 minutes, then fished the giblets in paper out, lol. It was very tender and well flavored. I immediately made bone broth with the juices and bones and then chicken salad and buffalo chicken pizza with the remains.
barbbat says
It’s not good to PC with frozen items. Let them defrost first. That way you can be absolutely sure of the item being thoroughly cooked. I just did this chicken and it was amazing!! Thanks for the recipe. Took the chicken out of the freezer the night before so no guesswork. It was delicious! Definitely gonna do this again!
Marjorie@APinchOfHealthy says
Yes, I definitely recommend doing them fully thawed for best results. 👍🏻 I am so glad it turned out well for you! 💖
Josh Puchall says
“It’s not good to PC with frozen items.”
That is completely untrue and you can pressure cook meat straight out of the freezer, generally without having to even add extra time. It just takes longer to pressurize when frozen.
James Marriott says
You left out what to do with the onion and lemon
Marjorie@APinchOfHealthy says
Oops! I put those in the cavity for extra flavor, FYI. I updated the recipe to show this. Thanks for speaking up!